My Quest for Italic Comments in Vim
I guess it all started with Operator Mono. It’s absolutely beautiful. If, however, you’re like me and simply refuse to spend $200 on a font…well, it’s out of reach. I’m sure it’s available on various torrenting sites but I’d rather find a solution to my problem that doesn’t require me to steal the work of others. And, well, I’m a lover of open source and I spend hours twiddling with my environment set up already; surely I can find a way to do this on my own, right?
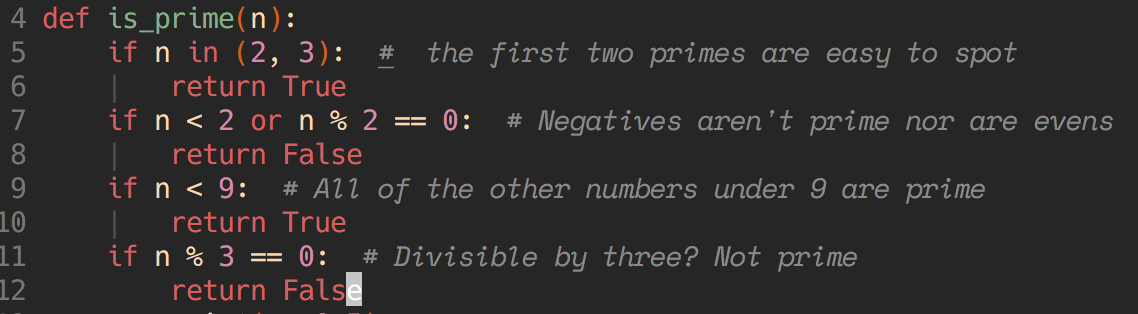
What I ended up with
Finding fonts
My editor font of choice is Hack. I’m a big fan of it’s curved tails, countered zeroes, and the fact that it’s open source makes it perfect for this task. It has an italic version but I wanted something that stood out. I came across a post from Matt McFarland where he detailed how to use two separate fonts, one for code and one for comments, in Atom. Vim, unfortunately, doesn’t use a stylesheet to determing which font to use for which highlight group. Vim also doesn’t allow you to have more than one font loaded at a time.
Occassionally, Twitter is awesome and Jem Bijoux gave me a great hint in how to solve this. They had combined Operator Mono with another font of their choice. I still didn’t want to buy Operator Mono, but I could combine fonts! I found the lovely Space Mono which is open to modification due to the Open Font License. Time to figure out how to combine fonts!
Combining fonts
This part is actually remarkably simple. First, I installed fontforge. I installed through Homebrew but you can install
it directly from the site if you want. Then open up your fonts in Font Forge! Here’s where we’ll likely start to diverge, you and I. I’m combining Hack and
Space Mono but you might want to combine two other fonts. Once you have both fonts open in Font Forge, come up with a clever name for their new font family.
I went with “Hacked Off”.
I had great success just following the instructions in this StackOverflow post. I’ll go over them again here, though, with some screenshots.
Whichever font is first, you need to change the following attributes:
- Family name (this is the name you’ll give Vim)
- Style name (regular, italic, etc)
You’ll find these attributes in the Font Info dialog which you can open through the Element menu.
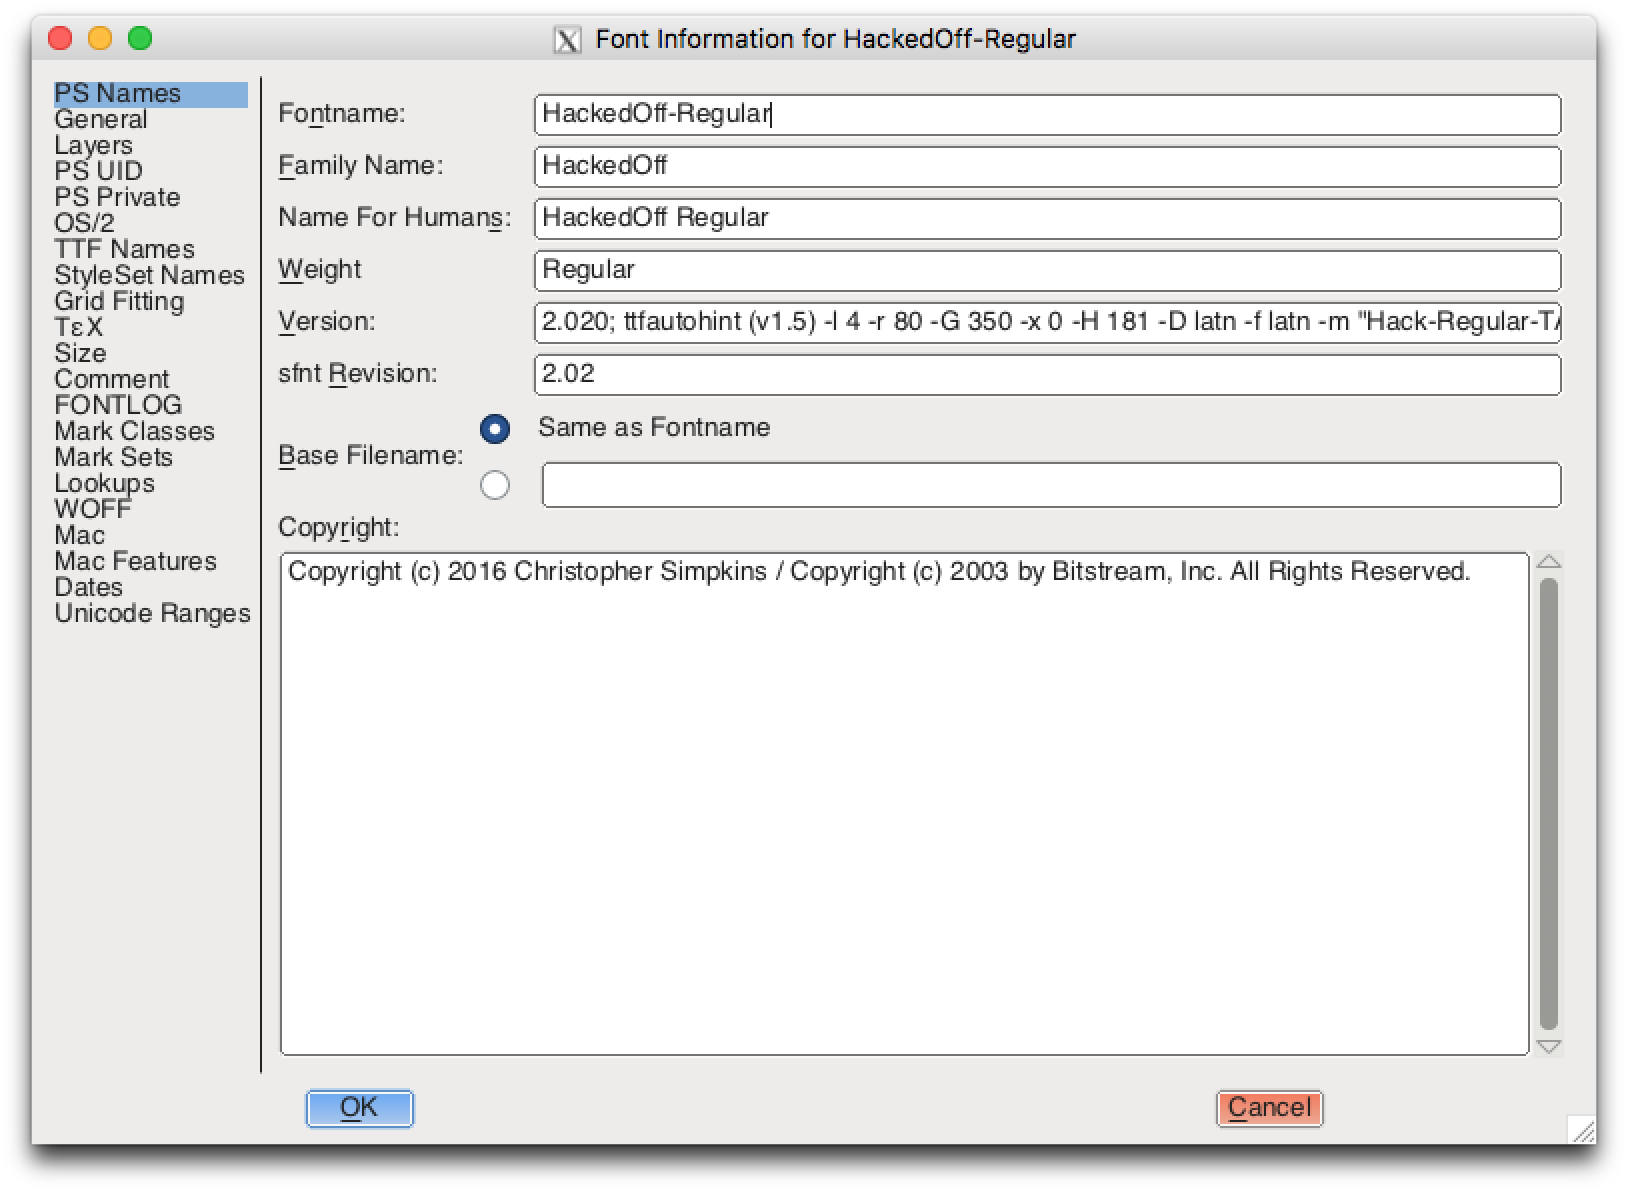
Font info window showing already changed values
You may get a dialog asking to change an existing value to a new, random one. Go ahead and let the system do that. When you’re happy with your names, go to
the File > Generate Fonts menu option. Under the font name (which you should change if it hasn’t been changed already), change the file type to “OpenType
(CFF)”. This should make the font more universally useful but I haven’t tested that yet.
Repeat these steps for the next font.
Once you have both of your fonts (or, I suppose, you could do a few more, too, if you wanted bold and/or bold-italic variants, too), install them with your OS. Again, I’ve only tested this with Mac OS X, but this part should work with other systems, too. At this point, you can change the font that iTerm uses for your profile.
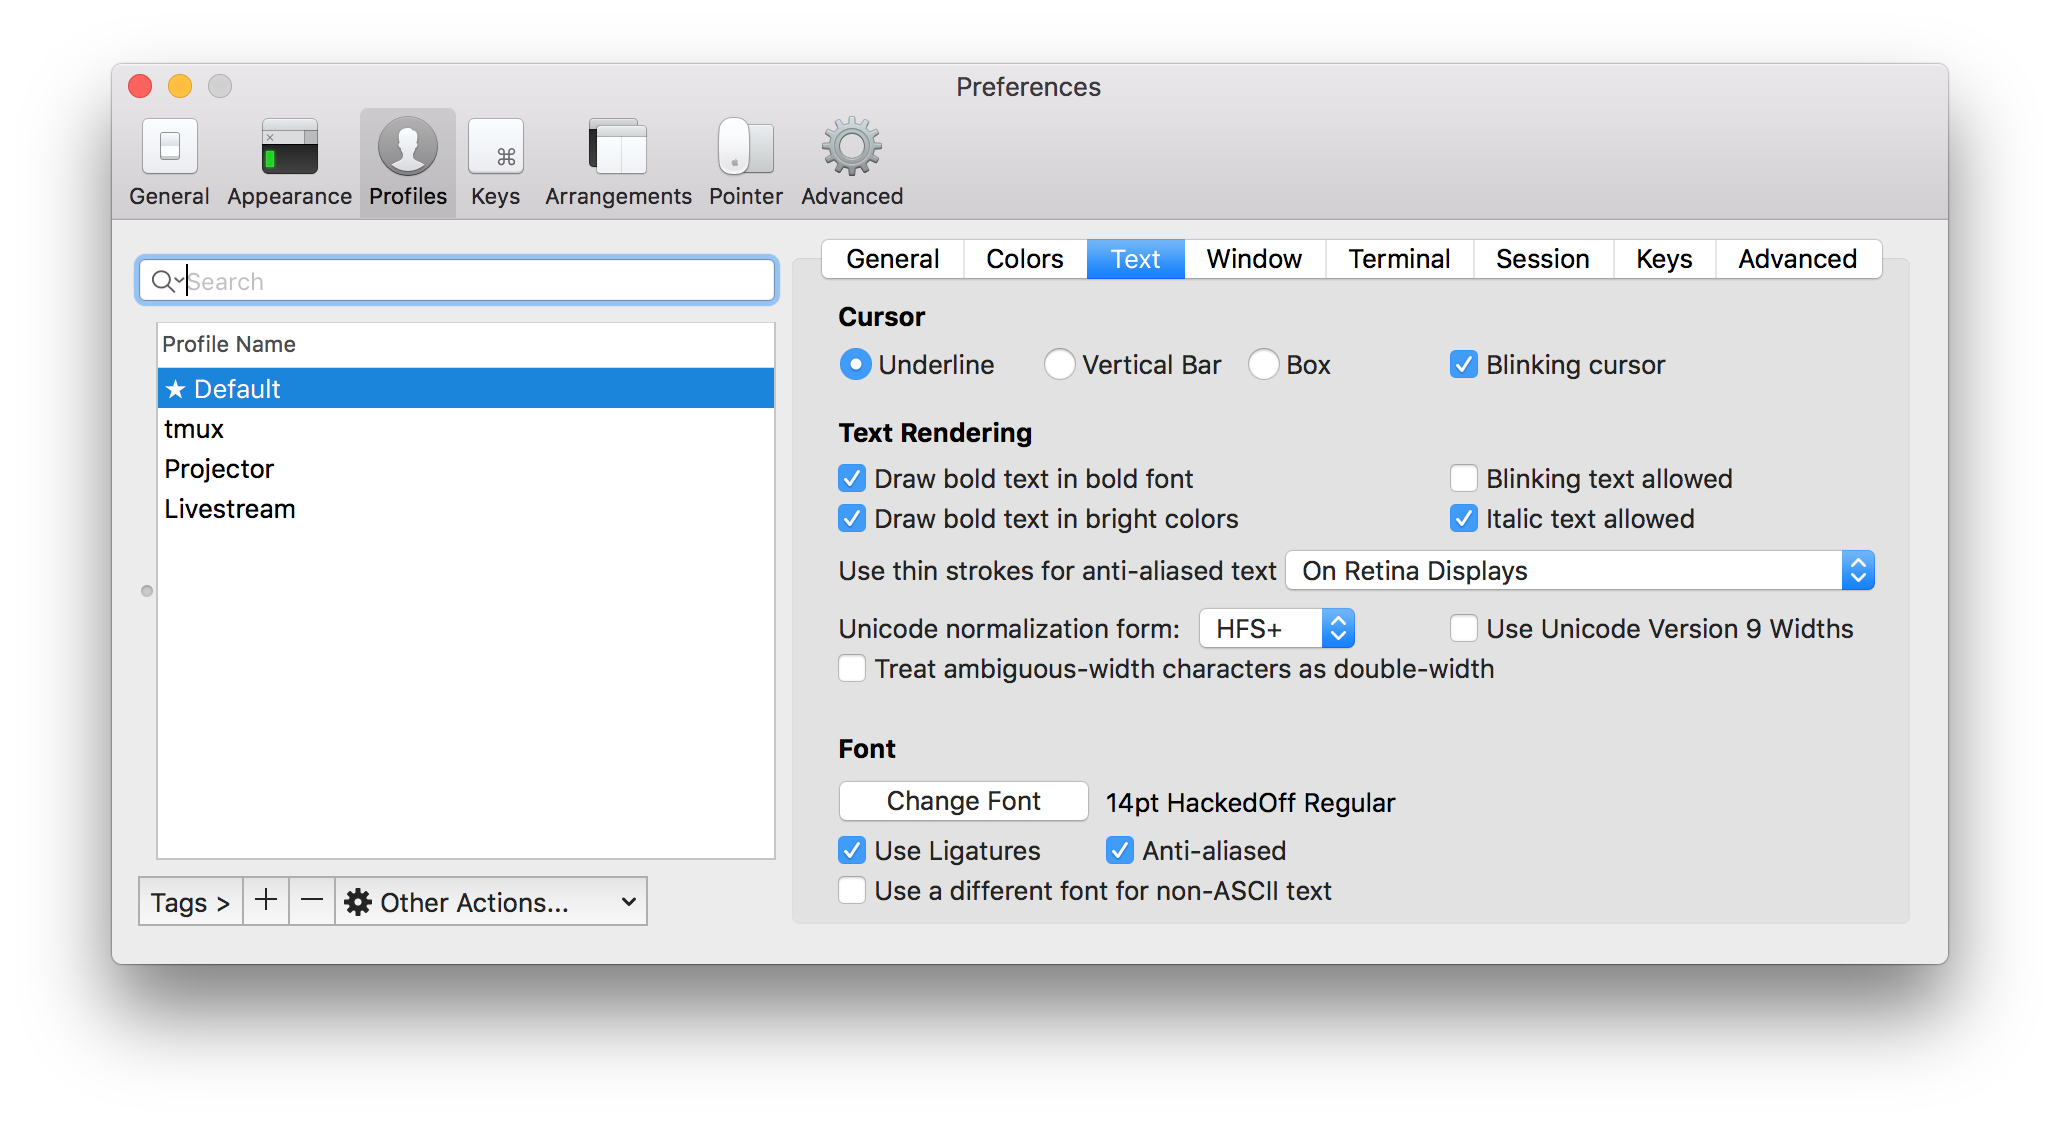
iTerm's profile font setting, already changed to HackedOff
I’d also go ahead and tell Vim to use an italic font for comments at this point. This is just a single line in your .vimrc file.
highlight Comment cterm=italicBe sure and set this after you set your colorscheme as the colorscheme could overwrite this setting.
Terminal profiles
For this last part, I mostly followed this guide by Alex Pierce. I had problems with a few parts,
even following Alex’s Tmux 2.2+ followup, so here’s what I did. First, I created a terminfo file for when I’m not using Tmux (which, let’s be honest, is
almost never).
# A xterm-256color based TERMINFO that adds the escape sequences for italic.
xterm-256color-italic|xterm with 256 colors and italic,
  sitm=\E[3m, ritm=\E[23m,
  use=xterm-256color,
I stored this file as ~/.config/xterm-256color-italic.terminfo but the file name doesn’t really matter. The first non-comment bit of code,
xterm-256color-italic defines the profile’s name. You can load this new profile by using the tic commandline tool.
$ tic ~/.config/xterm-256color-italic.terminfo
Then turn on this profile in iTerm.
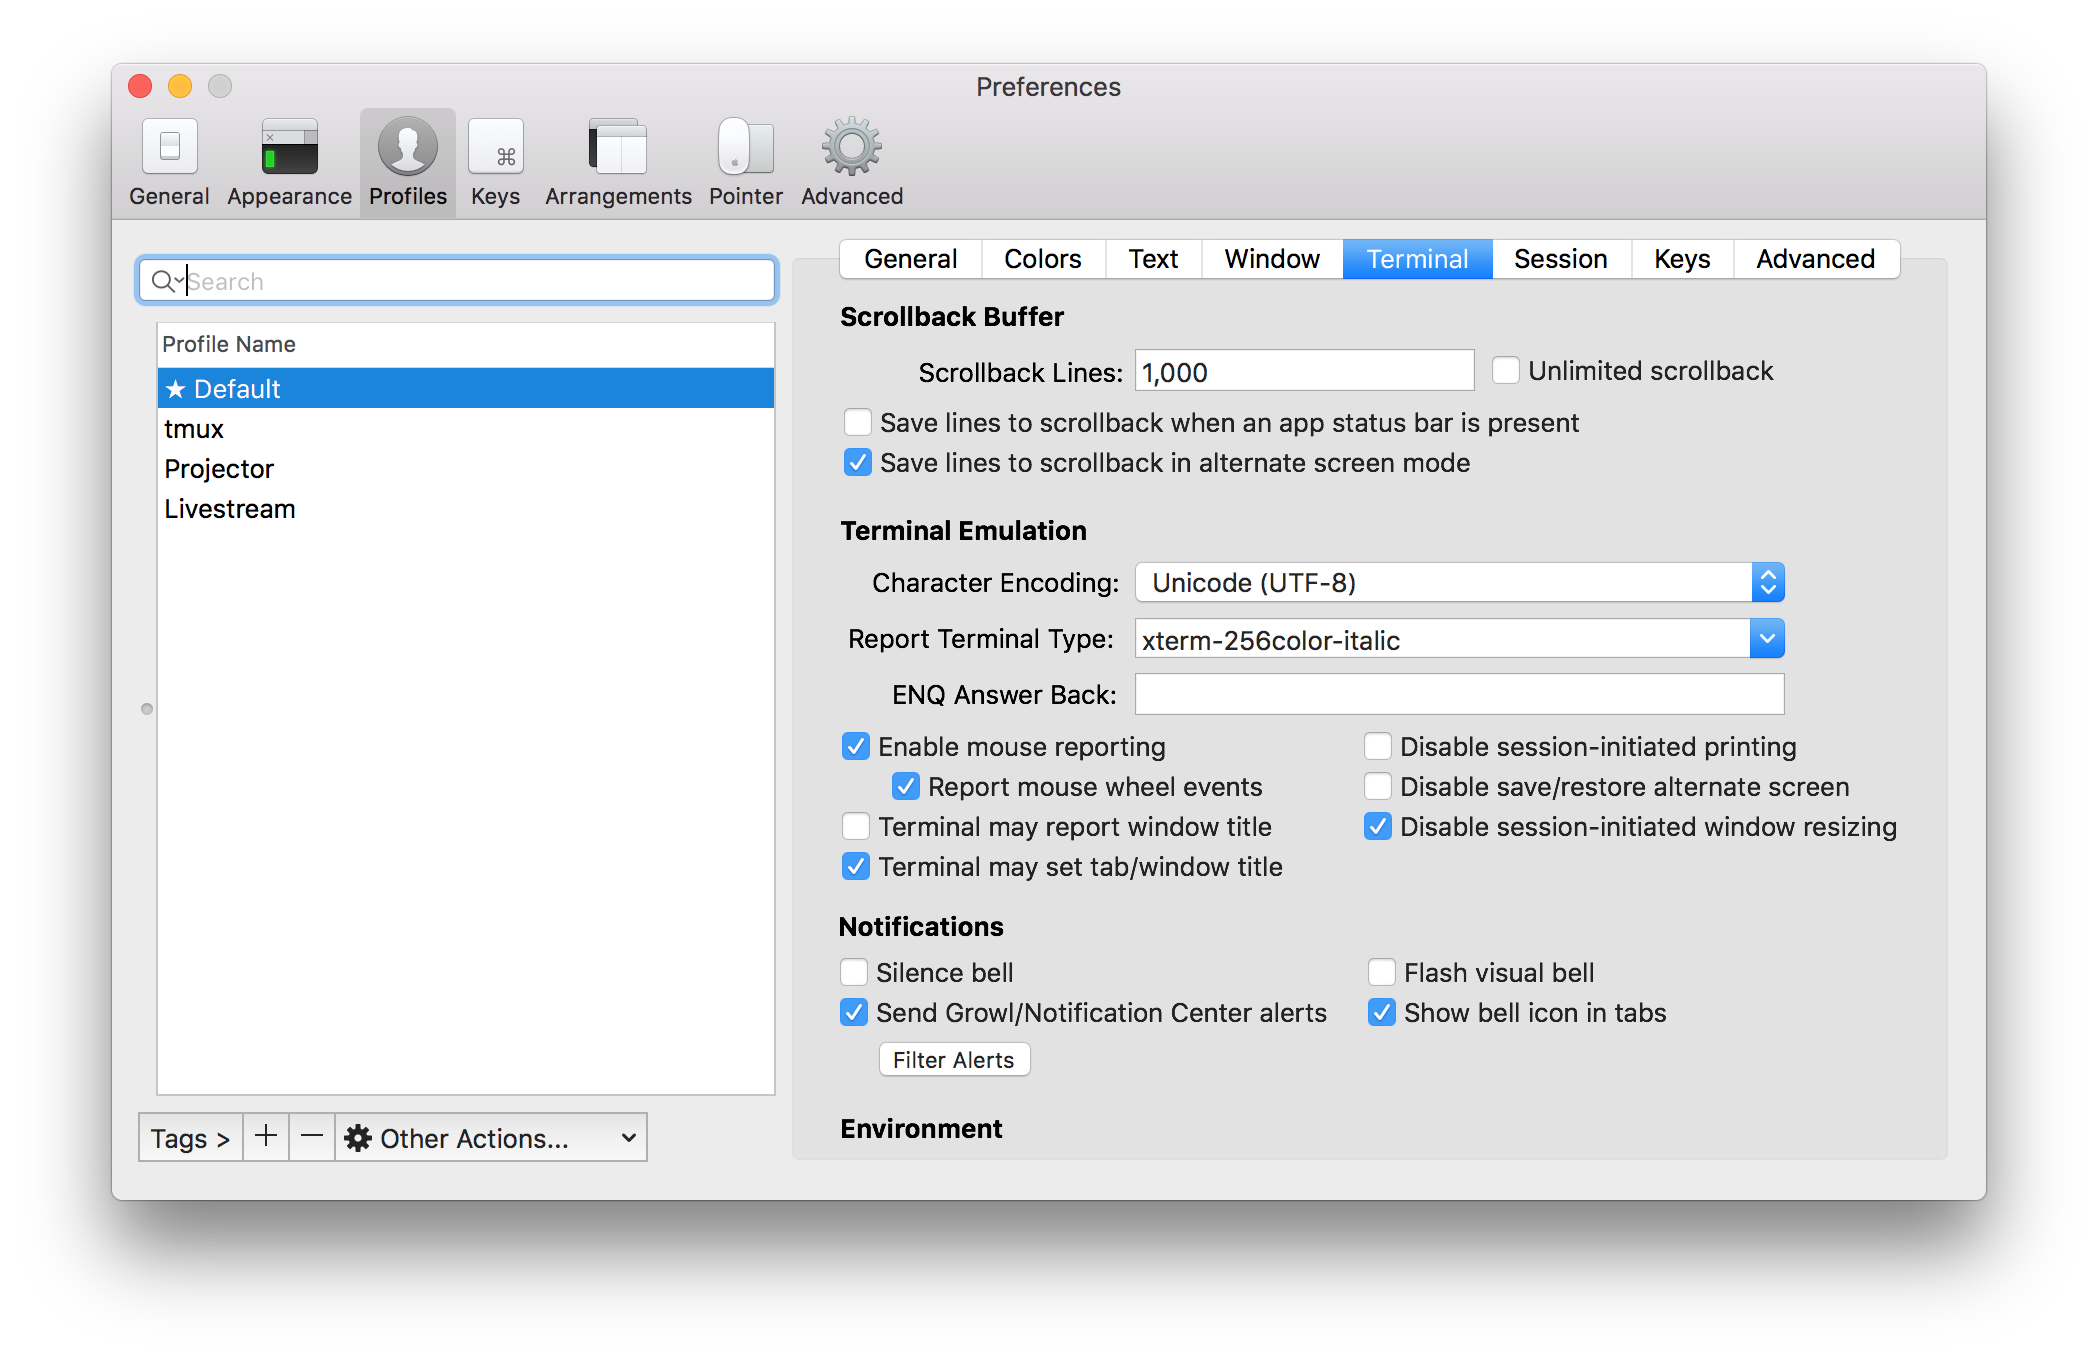
iTerm's terminal reporting setting, already changed to xterm-256color-italic
Now, inside of Tmux is a different beast. Tmux reports its terminal as screen-256color but that won’t include our italics. The article linked above
recommends sending some info to tic through cat but modern MacOS’s tic doesn’t seem to compile new directives through user
input like this. So,
again, I created a new file at ~/.config/tmux.terminfo with the following content:
tmux|tmux terminal multiplexer,
  ritm=\E[23m, rmso=\E[27m, sitm=\E[3m, smso=\E[7m, Ms@,
  use=xterm, use=screen,

tmux-256color|tmux with 256 colors,
  use=xterm-256color, use=tmux,
Just like before, you can load this into your terminal profiles with $ tic ~/.config/tmux.terminfo. Now we need to change our Tmux settings. Add the
following two lines to your ~/.tmux.conf.
set -g default-terminal "tmux-256color"
set -as terminal-overrides ',xterm*:sitm=\E[3m'
I’m honstly not sure if that second line needs to be there but I have it so you can too! That should be all you need to do. Quit out of Tmux, end any
running Tmux processes with killall tmux, start it back up again and you should have italic fonts in Vim both inside and outside of Tmux.
And now for something completely easier
That was the process I went through and I’m very happy with it. I feel like I could distribute my new font due to both Hack and Space Mono being open source fonts, but I’m not 100% certain so I’m not going to. Also, while looking up links for this post, I found Fantasque Sans Mono which already has the curly italic monospace built in. I could’ve just used that! But this has been a great bit of learning about minor font tweaking, adding new configurations to my terminal, and customizing just a bit more of Vim.